Physical Address
304 North Cardinal St.
Dorchester Center, MA 02124
Physical Address
304 North Cardinal St.
Dorchester Center, MA 02124
Helpful ideas. Squeaky value.
Helpful ideas. Squeaky value.

In a recent workshop demo, a Mars Rover rotated in a Rise course with clickable Storyline hotspots around it. Several people asked how to build it. The first step is creating the video, and PowerPoint is the tool for that part.
PowerPoint comes with a built-in library of 3D models. You can also insert your own using standard 3D file formats. The supported formats are .FBX, .OBJ, .3MF, .PLY, .STL, and .GLB.
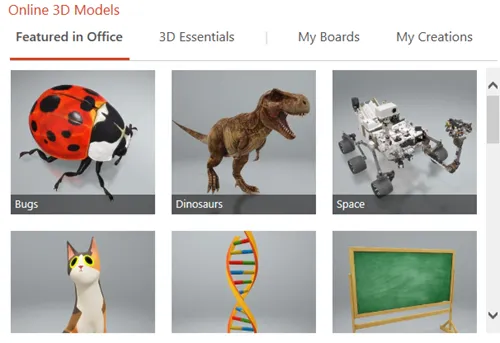
To insert a model, go to Insert and select 3D Models. Position the model on the slide and then duplicate the slide. The first slide will be your starting point, and the second will be your rotation endpoint.
Once you have two slides with the same 3D model, you can change its position, rotation, or scale on slide 2. When you apply the Morph transition to slide 2, PowerPoint animates the change between the two positions. The result looks like a smooth 3D rotation.
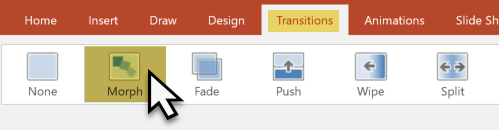
Here’s how to set it up:
If you want the model to appear to rotate in and then back out, add a third slide. Duplicate slide 1 and place it after slide 2. The morph transition will carry the model back to its starting position.
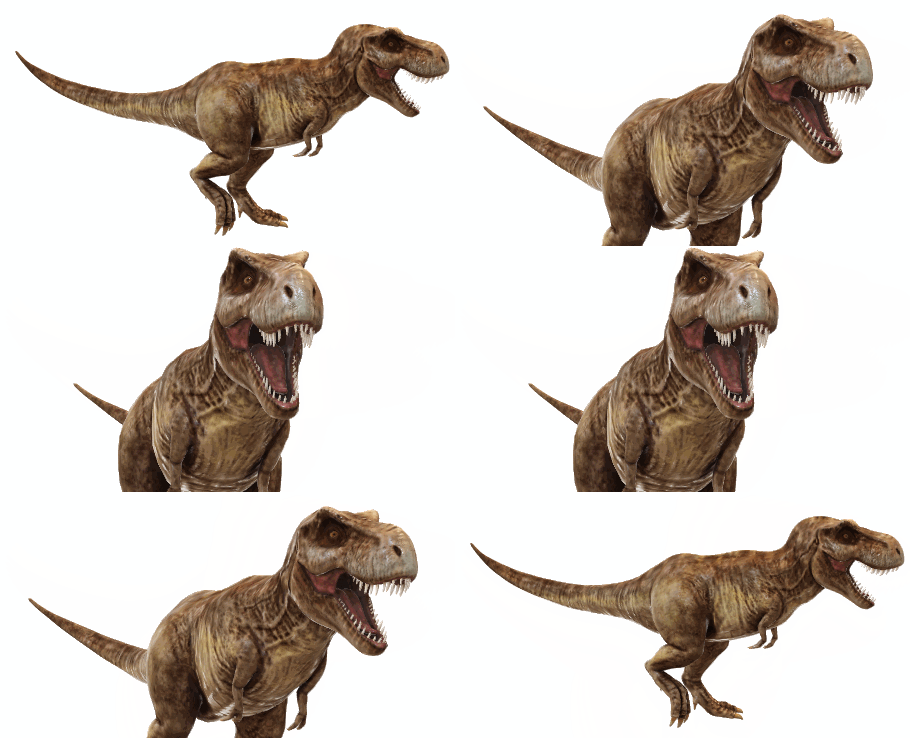
The speed of the animation is controlled by the slide duration in the Transitions tab. You set this under “Advance Slide.” Here’s how timing works across the three slides:
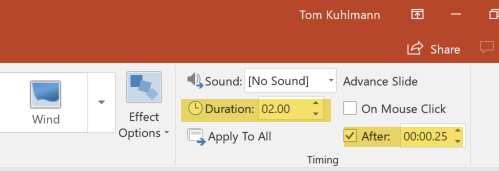
All slides need to use “Advance Slide after X seconds” so the animation runs without any clicks. This is required for the video export to work correctly.
Go to File, Export, and then Create a Video. PowerPoint offers two formats: .MP4 and .WMV.
Both work, but there’s a known issue with .MP4 files exported from PowerPoint. When used in Storyline, the end of the video can appear jumpy. Exporting as .WMV and letting Storyline handle the conversion resolves this. If you’re using the video outside of Storyline, .MP4 is fine.
This technique opens up a wide range of possibilities for interactive course content. Once you have the video, you can layer in hotspots, labels, and interactions in Storyline. Building that interactivity is covered in the follow-up post on creating interactive video in Storyline. What kind of 3D content would work best in your courses?