Physical Address
304 North Cardinal St.
Dorchester Center, MA 02124
Physical Address
304 North Cardinal St.
Dorchester Center, MA 02124
Helpful ideas. Squeaky value.
Helpful ideas. Squeaky value.

You’ve decided emojis belong in your course and you know which ones you want. Now you need to actually get them into the text. Here are three ways to do it, depending on your setup and personal preference.
The fastest way to open the emoji picker is a keyboard shortcut. On Windows, press Windows Key + period (.) to open the emoji panel. On a Mac, press Control + Command + Space.
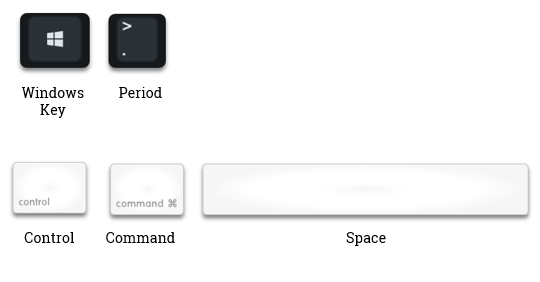
Once the panel is open, you can type to search for a specific emoji or browse by category. The Windows shortcut was added in a recent version of Windows 10. If it doesn’t work on your machine, the next method will.
Select Windows+V and you’ll see a pop up screen to add emojis.
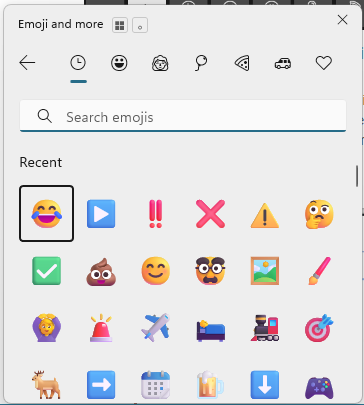
If you do most of your authoring in a web-based tool like Rise, a browser extension can save time. The “Emoji for Google Chrome” extension adds a picker directly to your browser toolbar. When you find the emoji you want, copy it and paste it wherever you need it.
Other browsers have similar extensions available. The process is slightly different in each one, so check the extension store for your specific browser.
Emojis don’t look the same everywhere. What you insert in your authoring tool may look different on a mobile device, in another browser, or in a document. The emoji will still be an emoji, but the style and detail can vary noticeably between platforms.
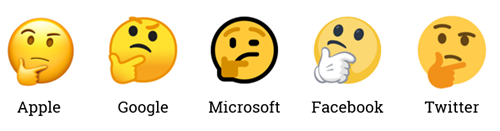
That’s worth considering if your learners access courses on different devices. Test your course on at least one mobile device before publishing to make sure the emojis you chose still work.
All three methods give you the same result: an emoji embedded in your text, scaling cleanly with the font. As you get comfortable with the shortcuts, inserting emojis becomes quick enough to be part of your normal workflow.